Kerberos and Spnego authentication on Windows with Firefox

By David WORMS
Nov 4, 2019
- Categories
- Cyber Security
- Tags
- Firefox
- HTTP
- FreeIPA
- Kerberos [more][less]
Never miss our publications about Open Source, big data and distributed systems, low frequency of one email every two months.
In Greek mythology, Kerberos, also called Cerberus, guards the gates of the Underworld to prevent the dead from leaving. He is commonly described as a three-headed dog, a serpent’s tail, mane of snakes and a lion’s claws. In computer, Kerberos is an authentication protocol based on the exchange of tickets. Windows 2000 and later versions use Kerberos as its default authentication method. It is often used as a Single Sign On (SSO) solution or to authenticate not only users but also computer nodes and services. It is frequently used in complex systems such as Hadoop based Big Data platforms.
When a user wish to gain access to a Kerberos secured service, he must first authenticate and, once successful, he will receive a master ticket called TGT stored on his local host. This ticket can later be used to create a service ticket (TS) which is used to access a remote service using an RPC connection or over HTTP. When the ticket is transmitted over HTTP, the communication make use of the SPNEGO protocol which store the ticket information into the HTTP header request.
The client installation procedure is very easy on Linux and OSX. Most of the time, Kerberos comes pre-installed or, if not, a simple command with your favourite package manager will install the client library. Safari will work right away while Firefox and Chrome will require some adjustments easily found on the Internet. While being easy on Linux and OSX, it is a little bit more complicated on Windows. If your host is integrated with an Active Directory, a ticket is already present. However, you cannot always use it to contact a remote service secured with Kerberos, for example because it exposes a domain which is not trusted by the Active Directory. Moreover, Windows has its own way to manage the Kerberos ticket.
The article explain how create a ticket with the MIT Kerberos client for Windows, how to store a ticket into its own file path and how to configure Firefox to make use of it.
Credential cache
Kerberos ticket are stored inside the credentials cache. There are multiple credentials cache supported on Windows:
- FILE caches
Simple and most portable. A simple flat file format is used to store one credential after another. This is the default on Linux and OSX. - API cache
Only implemented on Windows, it communicates with a server process that holds the credentials in memory. This seems to be the default on Windows.
The default credential cache name is determined by…
- The
KRB5CCNAMEenvironment variable - The
default_ccache_nameprofile variable in[libdefaults]of the configuration file - The hardcoded default,
DEFCCNAME, default toFILE:/tmp/krb5cc_%{uid}on Unix
Note about the credential cache path
In the procedures below, whether you choose to declare the credential cache with an environment variable or through the configuration file, don’t forget to replace {username} with your windows username. You can declare any path you wish. The path must correspond to the file where your Kerberos Ticket will be written. Its parent directory must exists with writable permissions by the user issuing the ticket.
Environment variable
Using the windows search, look for “environment variables” and select “Edit the system environment variables”. In the new window, click on the “Environment variables” button. From there, add a new user variable named “KRB5CCNAME” with the value C:\Users\{username}\AppData\Local\Temp\krb5cache.
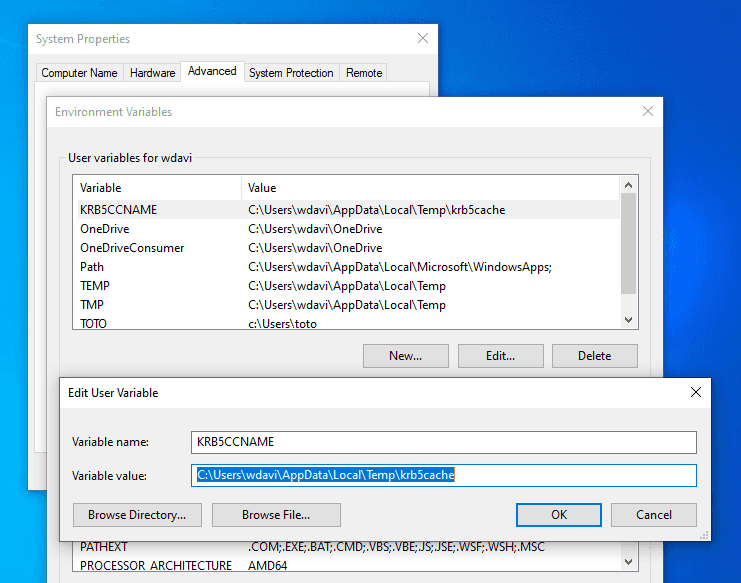
From the PowerShell console, you can print the value of the credential cache with the command $Env:KRB5CCNAME. You do not need to restart your host to activate the environment variable but you must reload your PowerShell session if it was already opened.
Configuration file
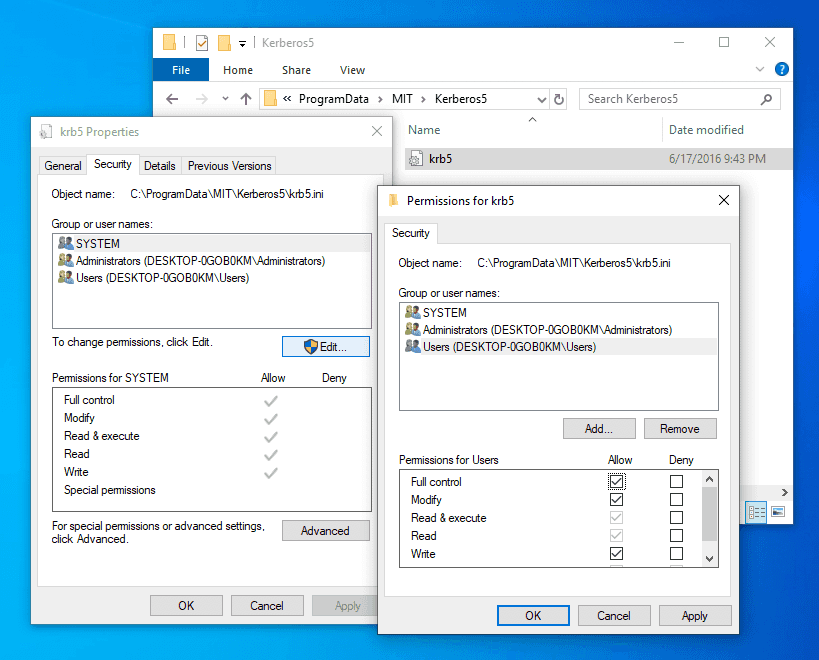
The path to the Kerberos client configuration is C:\ProgramData\MIT\Kerberos5\krb5.ini. We will get back to its full configuration later but for now, to set the credential cache, you only need to the set the default_ccache_name profile variable.
Navigate to the C:\ProgramData\MIT\Kerberos5 and change the permission to allow the current user to edit the file.
Now edit the file with your favorite code editor such as Sublime Text or Notepad++ and make it look like:
[libdefaults]
 default_ccache_name = C:\Users\{username}\AppData\Local\Temp\krb5cache
Kerberos
MIT Kerberos client installation
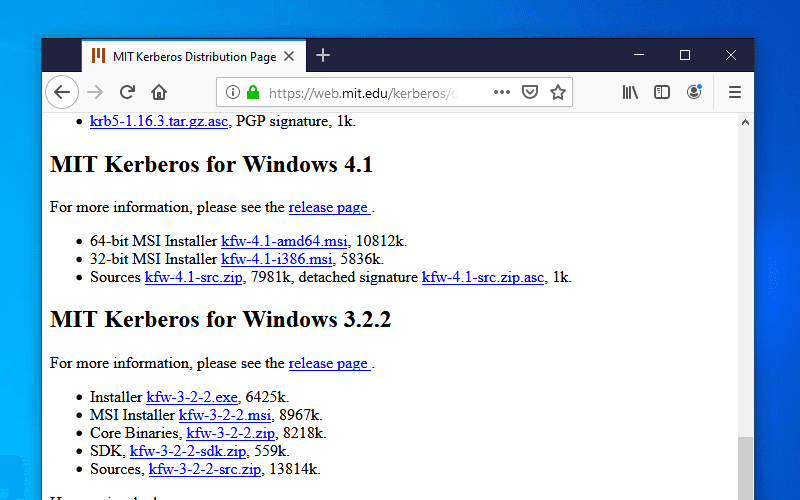
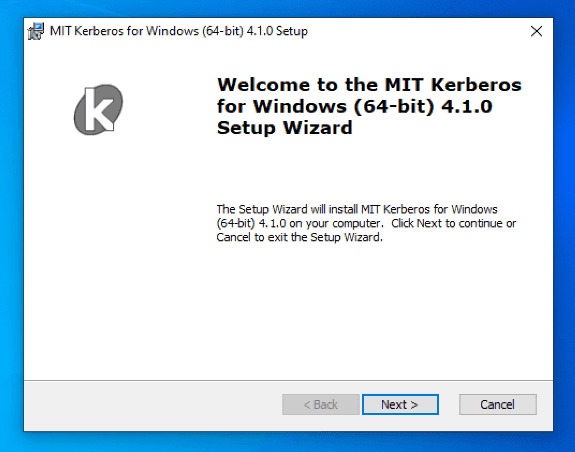
Download and install the Kerberos MIT client for Windows. The current version at the time of this writing is 4.1 and the download link is located in the section called “MIT Kerberos for Windows 4.1”.
This installation procedure is straightforward. Just accept all the default settings and move forward. Once the installation is complete, the installer will ask to restart the computer. It is probably not necessary but I didn’t had the time to check.
Automatic client discovery
Depending on your setup, you do not always need to modify the Kerberos client configuration. In the absence of entries in the configuration file, the KDC adress can be obtained from the DNS records. This feature can be desactivated if dns_lookup_kdc is false. The FreeIPA DNS service expose the following domain records:
_kerberosof type “TXT”, eg “AU.ADALTAS.CLOUD”_kerberos-master._tcpof type “SRV”_kerberos-master._udpof type “SRV”_kerberos._tcpof type “SRV”_kerberos._udpof type “SRV”_kpasswd._tcpof type “SRV”_kpasswd._udpof type “SRV”
Users of our Adaltas clusters with access to the cluster through a VPN tunnel transparently use our FreeIPA DNS server. It provides them with the auto discovery of the Kerberos server. You can check this on Linux with dig:
dig srv _kerberos._udp.au.adaltas.cloud +short
0 100 88 ipa-2.au.adaltas.cloud.
0 100 88 ipa1.au.adaltas.cloud.
As well as on Windows with nslookup:
nslookup -type=SRV _kerberos._udp.au.adaltas.cloud
Server:  ipa1.au.adaltas.cloud
Address:  10.0.0.5

_kerberos._udp.au.adaltas.cloud SRV service location:
         priority       = 0
         weight         = 100
         port           = 88
         svr hostname   = ipa1.au.adaltas.cloud
_kerberos._udp.au.adaltas.cloud SRV service location:
         priority       = 0
         weight         = 100
         port           = 88
         svr hostname   = ipa-2.au.adaltas.cloud
au.adaltas.cloud        nameserver = ipa1.au.adaltas.cloud
ipa1.au.adaltas.cloud   internet address = 10.0.0.5
ipa-2.au.adaltas.cloud  internet address = 10.0.0.9
Client configuration
Alternatively, you may need to create or import your own kerberos configuration file. The path to the file is C:\ProgramData\MIT\Kerberos5\krb5.ini.
If you have access to an environment with Kerberos enabled, such as a Linux box through SSH, then you already have access to the Kerberos configuration. On Linux, the file is readable by every users and it is located at “/etc/krb.conf”. You can simply import the file into your Windows host and rename it “krb5.ini” instead than “krb5.conf”. Here is an example which you could adjust with your own settings.
[libdefaults]
 default_realm = AU.ADALTAS.CLOUD
 dns_lookup_realm = false
 dns_lookup_kdc = true
 rdns = false
 ticket_lifetime = 24h
 forwardable = true
 udp_preference_limit = 0

[realms]
 AU.ADALTAS.CLOUD = {
  kdc = ipa1.au.adaltas.cloud:88
  master_kdc = ipa1.au.adaltas.cloud:88
  admin_server = ipa1.au.adaltas.cloud:749
  default_domain = au.adaltas.cloud
 }

[domain_realm]
 .au.adaltas.cloud = AU.ADALTAS.CLOUD
 au.adaltas.cloud = AU.ADALTAS.CLOUD
 ipa1.au.adaltas.cloud = AU.ADALTAS.CLOUD
Ticket creation
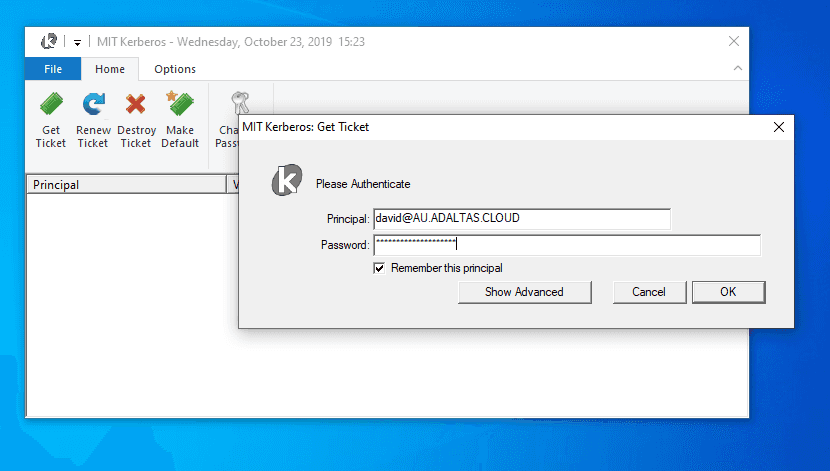
The ticket can now be created from the Kerberos client window by entering your provided principal and password.
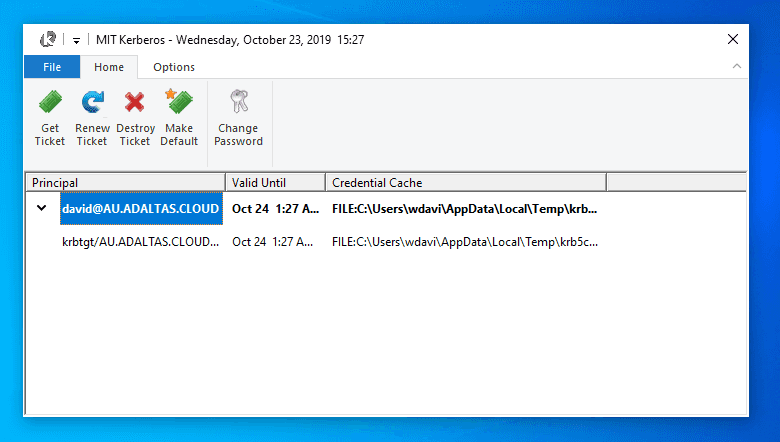
If successful, you shall view your ticket as well as some complimentary information such as the validation date as well as the credential cache location.
Note, opening the Kerberos client window to enter your Kerberos credential is not mandatory. Once Firefox is configured (see the next section), you can directly enter your destination URL and a new window will pop up asking for your principal and username.
Firefox
Configuration
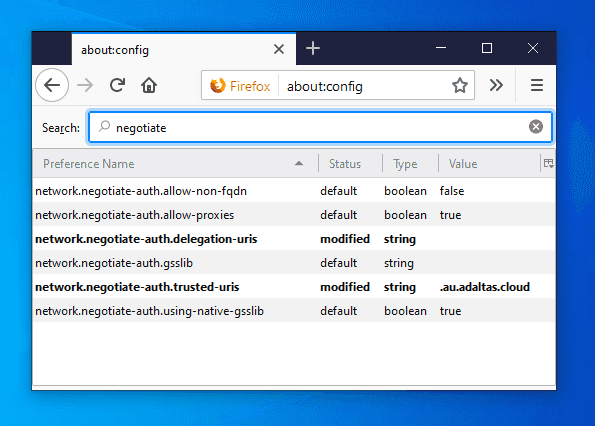
We have created a Kerberos ticket and we now need to configure Firefox to use it. Before going to your destination URL, you must edit the configuration window by writing “about:config” in the adress bar.
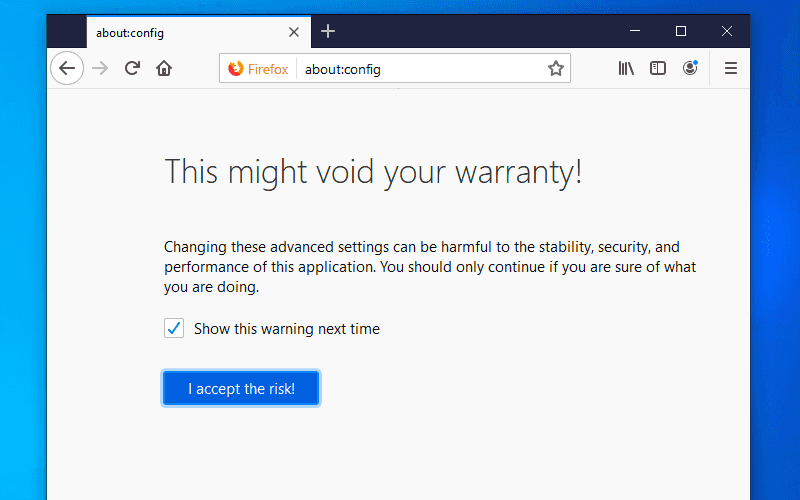
Accept the risk and modify the following properties:
network.negotiate-auth.trusted-uris:.au.adaltas.cloud
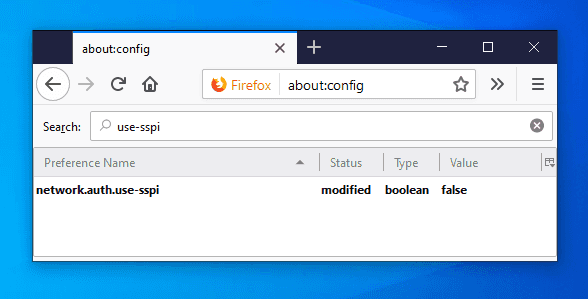
Lists the sites that are permitted to engage in SPNEGO authentication with the browser.network.auth.use-sspi:false
Determines whether to use SSPI or GSSAPI for Kerberos authentication. SSPI is a proprietary variant of GSSAPI with extensions and Windows-specific data types. It is the default API on Windows. GGSAPI is an IETF standard and it is used by the MIT Kerberos client we just installed and used.
Also, while not being mandatory, you can change the following variables:
network.negotiate-auth.delegation-uris:.au.adaltas.cloud
Lists the sites for which the browser may delegate user authorization to the server.network.negotiate-auth.using-native-gsslib:false
Use the default GSSAPI library.network.negotiate-auth.gsslib:C:\Program Files\MIT\Kerberos\bin\gssapi64.dll
Specifies a alternate GSSAPI shared library. Modify the path to the appropriate dll depending on your host architecture (32 or 64 bits).network.negotiate-auth.allow-non-fqdn:true
Accepts service domain names instead of fully qualified domain names.
Ticket creation
If you try to access a service URL secured with Kerberos but without a valid ticket, you will see such a page:
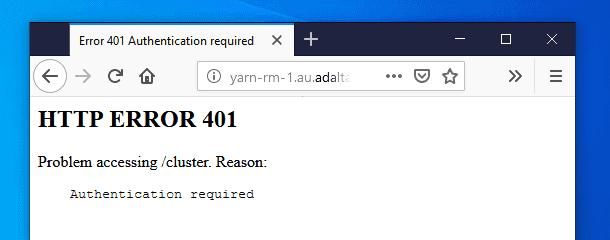
The 401 HTTP error code indicates that your browser failed to negotiate the authentication. As part of the SPNEGO protocol, the server has requested to negotiate the authentication by returning the WWW-Authenticate: Negotiate response header. However your browser couldn’t propose any suitable method. You can see this exchange with the curl command:
curl --negotiate -u: --head http://yarn-rm-1.au.adaltas.cloud:8088/cluster
HTTP/1.1 401 Authentication required
Date: Thu, 24 Oct 2019 09:57:48 GMT
Date: Thu, 24 Oct 2019 09:57:48 GMT
Pragma: no-cache
WWW-Authenticate: Negotiate
Set-Cookie: hadoop.auth=; Path=/; HttpOnly
Cache-Control: must-revalidate,no-cache,no-store
Content-Type: text/html;charset=iso-8859-1
Content-Length: 267
The --negotiate argument tell to curl to negotiate the authentication with the remote service. The --user argument provide the required username and password which are empty in the case of Kerberos since the credential information is stored inside the local ticket.
With a valid ticket, the negotiation will succeed and you ticket will be encrypted as base64 in the second WWW-Authenticate header:
curl --negotiate -u: --head http://yarn-rm-1.au.adaltas.cloud:8088/cluster
HTTP/1.1 401 Authentication required
Date: Thu, 24 Oct 2019 09:58:17 GMT
Date: Thu, 24 Oct 2019 09:58:17 GMT
Pragma: no-cache
WWW-Authenticate: Negotiate
Set-Cookie: hadoop.auth=; Path=/; HttpOnly
Cache-Control: must-revalidate,no-cache,no-store
Content-Type: text/html;charset=iso-8859-1
Content-Length: 267
HTTP/1.1 405 HTTP method GET is not supported by this URL
Date: Thu, 24 Oct 2019 09:58:17 GMT
Date: Thu, 24 Oct 2019 09:58:17 GMT
Pragma: no-cache
WWW-Authenticate: Negotiate oYH1MIHyoAMKAQChCwYJKoZIhvcSAQICom4EbGBqBgkqhkiG9xIBAgICAG9bMFmgAwIBBaEDAgEPok0wS6ADAgESokQEQhnlSj8cuKVGz6eBMJNi9R8ImTtdpJU4zV8N4s4EwJxpnmU0ZohrBtavGQxoXFSuuxScHcpiNVL51qEJzsoAA6x6iqNuBGxgagYJKoZIhvcSAQICAgBvWuBZoAMCAQWhAwIBD6JNMEugAwIBEqJEBEIZ5Uo/HLilRs+ngTCTYvUfCJk7XaSVOM1fDeLOBMCcaZ5lNGaIawbWrxkMaFxUrrsUnB3KYjVS+dahCc7KAAOseoo=
Set-Cookie: hadoop.auth="u=david&p=david@AU.ADALTAS.CLOUD&t=kerberos&e=1571947097972&s=Df9/vrrj4xHASRxHPdBJHOCap4Gdmvst1QCnjFXuceI="; Path=/; HttpOnly
X-Frame-Options: SAMEORIGIN
Vary: Accept-Encoding
Cache-Control: must-revalidate,no-cache,no-store
Content-Type: text/html;charset=iso-8859-1
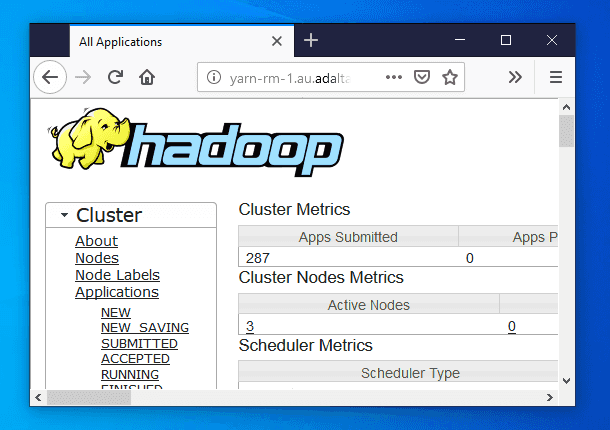
Content-Length: 309And you can finally access all your Kerberos secured service without having to renter your login credentials: