

 Private Cloud")
Using Cloudera Deploy to install Cloudera Data Platform (CDP) Private Cloud

Jul 23, 2021
Never miss our publications about Open Source, big data and distributed systems, low frequency of one email every two months.
Following our recent Cloudera Data Platform (CDP) overview, we cover how to deploy CDP private Cloud on you local infrastructure. It is entirely automated with the Ansible cookbooks published by Cloudera and it is reproducible on your local host with Vagrant.
CDP is an enterprise data cloud. It provides a powerful Big Data platform, built-in security with automatic compliance and governance of data protection, as well as policy-based, metadata-driven analytics for end users.
Deploying a CDP Private Cloud cluster is not a straightforward task. Therefore, we present a way of getting a local cluster up and running in a few simple steps. We will deploy a basic cluster composed of two nodes, one master and one worker. In our cluster, we will be running the following services: HDFS, YARN and Zookeeper.
Prerequisites
You can use the local infrastructure of your choice to deploy CDP Private Cloud. In this tutorial, we will be using Vagrant and VirtualBox to quickly bootstrap two virtual machines that will serve as the cluster’s nodes.
VirtualBox
VirtualBox is a cross-platform virtualization application. Download the latest version of VirtualBox.
Vagrant
Vagrant is a tool for building and managing virtual machine environments. Download the latest version of Vagrant.
Once Vagrant is installed, you need to install a plugin which automatically installs the host’s VirtualBox Guest Additions on the guest system. Open a terminal and type in the following command:
vagrant plugin install vagrant-vbguestDocker
Cloudera Deploy is run from inside a Docker container. When executed, it bootstraps the cluster. Follow the official Docker instructions to install Docker on your machine:
Getting started
Bootstrap your nodes
A Vagrantfile is used to configure and provision virtual machines on a per-project basis. Make sure you have an ssh key on your host machine before going forward. If none is provided, the Quickstart (next section) will generate a SSH keypair. Create a new file called Vagrantfile in your working directory and paste the following code:
box = "centos/7"

Vagrant.configure("2") do |config|
  config.vm.synced_folder ".", "/vagrant", disabled: true
  config.ssh.insert_key = false
  config.vm.box_check_update = false
  ssh_pub_key = File.readlines("#{Dir.home}/.ssh/id_rsa.pub").first.strip
  config.vm.provision "Add ssh_pub_key", type: "shell" do |s|
    s.inline = <<-SHELL
      echo #{ssh_pub_key} >> /home/vagrant/.ssh/authorized_keys
      sudo mkdir -p /root/.ssh/
      sudo echo #{ssh_pub_key} >> /root/.ssh/authorized_keys
      sudo touch /home/vagrant/.ssh/config
      sudo chmod 600 /home/vagrant/.ssh/config
      sudo chown vagrant /home/vagrant/.ssh/config
    SHELL
  end
  config.vm.define :master01 do |node|
    node.vm.box = box
    node.vm.network :private_network, ip: "10.10.10.11"
    node.vm.network :forwarded_port, guest: 22, host: 24011, auto_correct: true
    node.vm.network :forwarded_port, guest: 8080, host: 8080, auto_correct: true
    node.vm.provider "virtualbox" do |d|
      d.memory = 8192
    end
    node.vm.hostname = "master01.nikita.local"
  end
  config.vm.define :worker01 do |node|
    node.vm.box = box
    node.vm.network :private_network, ip: "10.10.10.16"
    node.vm.network :forwarded_port, guest: 22, host: 24015, auto_correct: true
    node.vm.provider "virtualbox" do |d|
      d.customize ["modifyvm", :id, "--memory", 2048]
      d.customize ["modifyvm", :id, "--cpus", 2]
      d.customize ["modifyvm", :id, "--ioapic", "on"]
    end
    node.vm.hostname = "worker01.nikita.local"
  end
end
The master01 node has the master01.nikita.local FQDN and the 10.10.10.11 IP. The worker01 node has the master01.nikita.local FQDN and the 10.10.10.16 IP.
Now run the following command:
vagrant upIt creates two connected virtual machines which constitutes a small cluster.
Edit your local /etc/hosts file by adding the following lines:
10.10.10.11 master01.nikita.local
10.10.10.16 worker01.nikita.local
Now connect to master01 using ssh:
vagrant ssh master01Add or edit the following lines to the /etc/hosts file:
10.10.10.11 master01.nikita.local
10.10.10.16 worker01.nikita.local
Repeat the operation by connecting to worker01.
Download the quickstart script
The quickstart.sh script will setup the Docker container with the software dependencies you need for deployment. Download it to your host machine using the following command:
curl https://raw.githubusercontent.com/cloudera-labs/cloudera-deploy/main/quickstart.sh -o quickstart.shRun the quickstart script
The script will prepare and execute the Ansible Runner inside a Docker container.
chmod +x quickstart.sh
./quickstart.sh
You should see the cldr {build}-{version} #> orange prompt. You are now inside the container.
Create an inventory file
Navigate to the cloudera-deploy folder:
cd /opt/cloudera-deploy/Create a new file called inventory_static.ini which contains your hosts:
[cloudera_manager]
master01.nikita.local

[cluster_master_nodes]
master01.nikita.local host_template=Master1

[cluster_worker_nodes]
worker01.nikita.local

[cluster_worker_nodes:vars]
host_template=Workers

[cluster:children]
cluster_master_nodes
cluster_worker_nodes

[db_server]
master01.nikita.local

[deployment:children]
cluster
db_server

[deployment:vars]
# Ansible will defer to the running SSH Agent for relevant keys
# Set the following to hardcode the SSH private key for the instances
# ansible_ssh_private_key_file=~/.ssh/mykey.pem
ansible_user=vagrant
Configure the cluster
Set use_download_mirror to no in the definition file located at examples/sandbox/definition.yml to avoid triggering behavior that relies on public cloud services.
Run the main playbook
ansible-playbook /opt/cloudera-deploy/main.yml -e "definition_path=examples/sandbox" -e "profile=/opt/cloudera-deploy/profile.yml" -i /opt/cloudera-deploy/inventory_static.ini -t default_clusterThe command creates a CDP Private Base cluster using your local infrastructure. More specifically, it deploys a cluster with HDFS, YARN and Zookeeper.
Conclusion
Cloudera Data Platform can be deployed in various ways which makes it a versatile option when considering a data platform. In this article, we described how to deploy a CDP Private Cloud cluster with Cloudera’s official deployment scripts. This allows the user to test the platform locally and make relevant business decisions. From there, you can add services to your cluster as well as configure CDP Private Cloud’s built in components.
Troubleshoot
Should you encounter any issues with SSH between the host and the two virtual machines, you can force the installation of Virtualbox Guest Additions for master01 and worker01 by adding the following line to their individual configurations in Vagrantfile:
node.vbguest.installer_options = { allow_kernel_upgrade: true }SSH_AUTH_SOCK
The quickstart.sh script can abruptly exit if it detects that the SSH_AUTH_SOCK path is not properly defined or empty. If you encounter this error, first run the following command:
echo $SSH_AUTH_SOCKThis returns the path to the unix socket used by ssh-agent, which needs to be added as the variable SSH_AUTH_SOCK to the quickstart script for ssh to work properly; your quickstart script should now look like this:
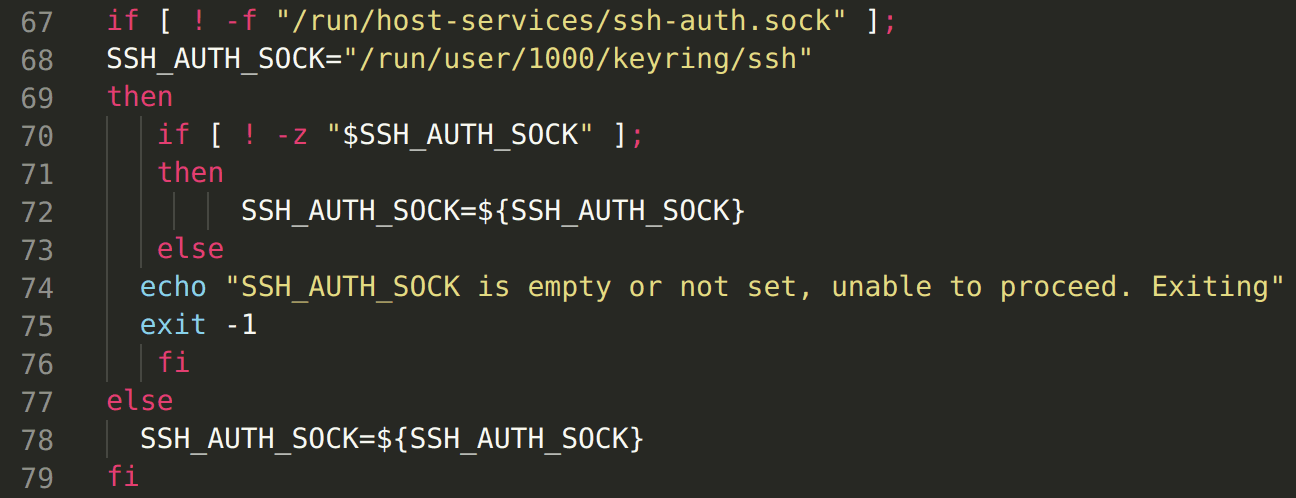
In this example case, the socket’s path is “/run/user/1000/keyring/ssh”.
