


Apache Hop 101, quick tutorial to get started

By Mori HUANG
May 26, 2026
Never miss our publications about Open Source, big data and distributed systems, low frequency of one email every two months.
This hands-on tutorial walks through the creation of a project, pipeline, and workflow in Apache Hop. Building on the core concepts introduced in the previous article and using a Docker-based environment, it covers the full cycle from designing a data pipeline with CSV transforms to orchestrating it through a workflow and executing it both locally and on a remote Hop server.
This article is part of a serie of 2 articles:
- Apache Hop 101, introduction and installation
- Apache Hop 101, quick tutorial to get started
Project creation
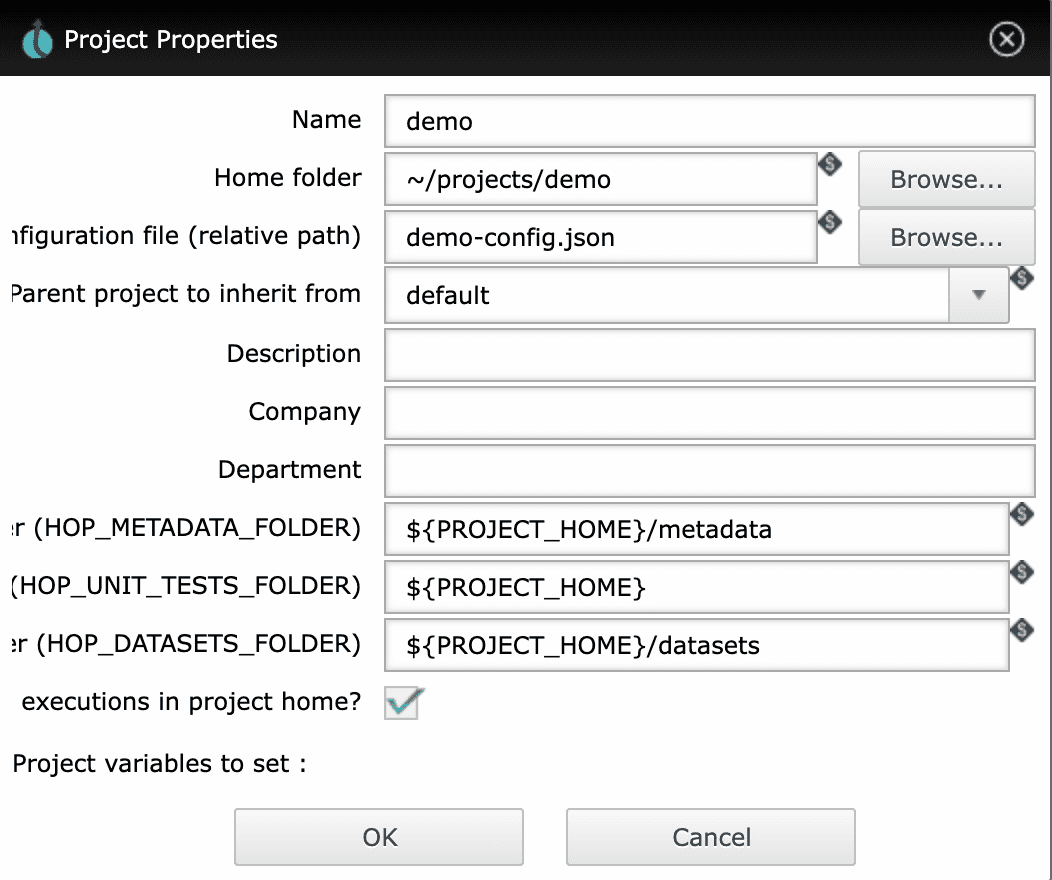
In Hop Web, a new project is created by clicking the “P+” button on the top side of the interface. The screenshot below provides a reference.

- Name:
demo - Home folder:
~/projects/demo(ensure the project is located outside of the Hop binaries directory) - Configuration file:
demo-config.json
After the details are entered, selecting “OK” confirms the configuration. In the following dialog, choosing “Yes” adds the project to a lifecycle environment.
The “Environment Properties” configuration enables the project to access environment-specific variables.
- Name:
demo_env - Purpose:
Development
The result is the same as shown in the following screenshot.
Pipeline creation
A new pipeline is created by clicking the ”+” icon in the top toolbar of the Hop Web where “Pipeline” is chosen from the “File” section to create a new pipeline. The pipeline is still empty but it is saved first by clicking on the “Save As” icon in the top toolbar.
- Location:
/home/hop/projects/demo/pipeline-1.hpl
The pipeline configuration file pipeline-1.hpl is found in the project directory.
cat ./hop-web/projects/demo/pipeline-1.hplA source file containing a list of countries is created in the CSV format.
cat <<EOF > ./hop-web/projects/demo/countries.csv
id,code,name
1,fr,France
2,de,Germany
3,it,Italy
4,pl,Poland
EOF
mkdir -p ./hop-server/projects/demo/
cp ./hop-web/projects/demo/countries.csv ./hop-server/projects/demo/
In Hop Web, clicking on the canvas brings up the pipeline editor, allowing exploration of available transforms. The “CSV file input” transform, listed under the “Input” category, is among the options detailed in the pipeline transforms documentation
A “CSV file input” icon is created on the canvas with the following configuration:
- Filename:
/home/hop/projects/demo/countries.csv - Header row present?:
checked
“Get Fields” button analyzes the schema of the input data, while the “Preview” button displays a sample of the dataset.
A second transform, “Text file output”, is added by selecting it from the canvas under the “Output” category. A connection is established by clicking the first transform, choosing “Create hop”, and dragging the arrow to the new transform, then selecting “Main output of transform”. This sets up the data flow between the transforms. The next step involves configuring the “Text file output” settings.
- File > Filename:
${PROJECT_HOME}/output - File > Extension:
csv
In the “Fields” tab, the “Get Fields” automatically populates the list of fields, the “Minimal width” avoids unnecessary spaces being added to the data columns.
Git initiation
The project directory is initialized with Git to enable version control.
docker exec -it hop-web /bin/bash
cd /home/hop/projects/demo
git init
git config --global user.name "<Git username>"
git config --global user.email "<Git email>"
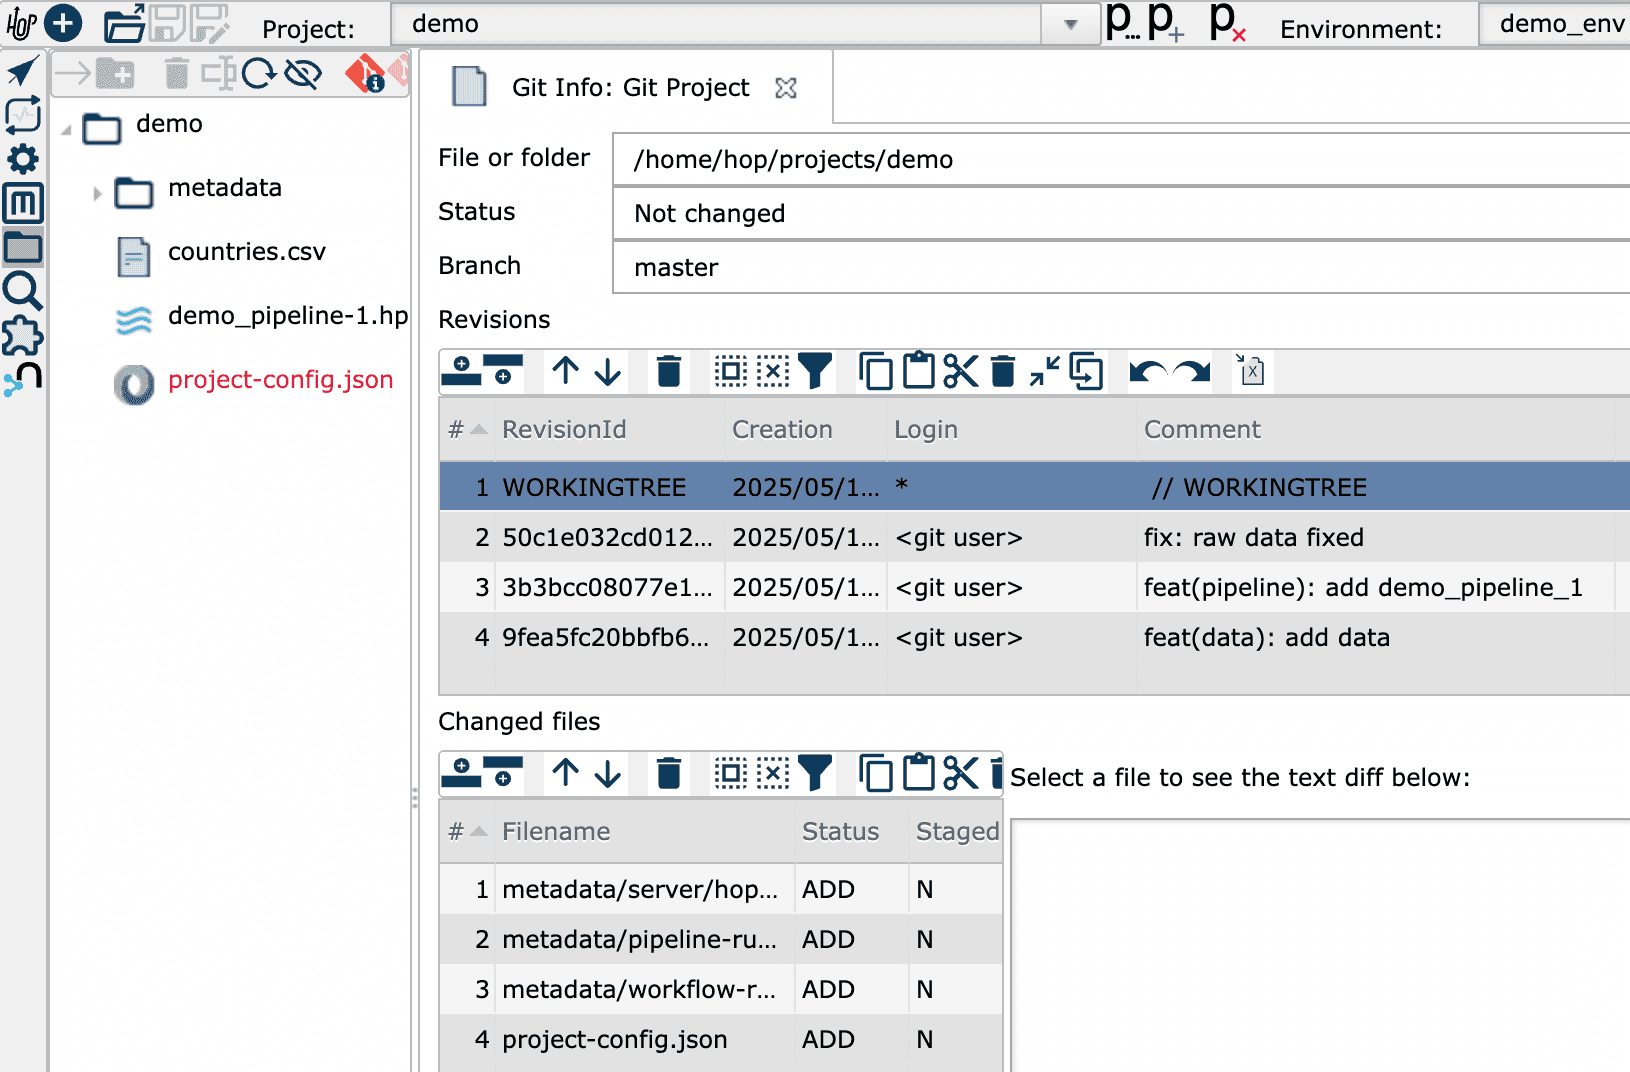
The “File Explorer” entity in the right toolbar displays Git information and allows Git operations to be performed directly within it.
Workflow creation
Similar to creating a pipeline, a new workflow is created by clicking the ”+” icon in the top toolbar. The first action “Start” is automatically added. The workflow is saved by clicking on the “Save As” icon in the top toolbar.
- Location:
/home/hop/projects/demo/workflow-1.hwf
The canvas provides a tool for editing workflow and exploring available actions.
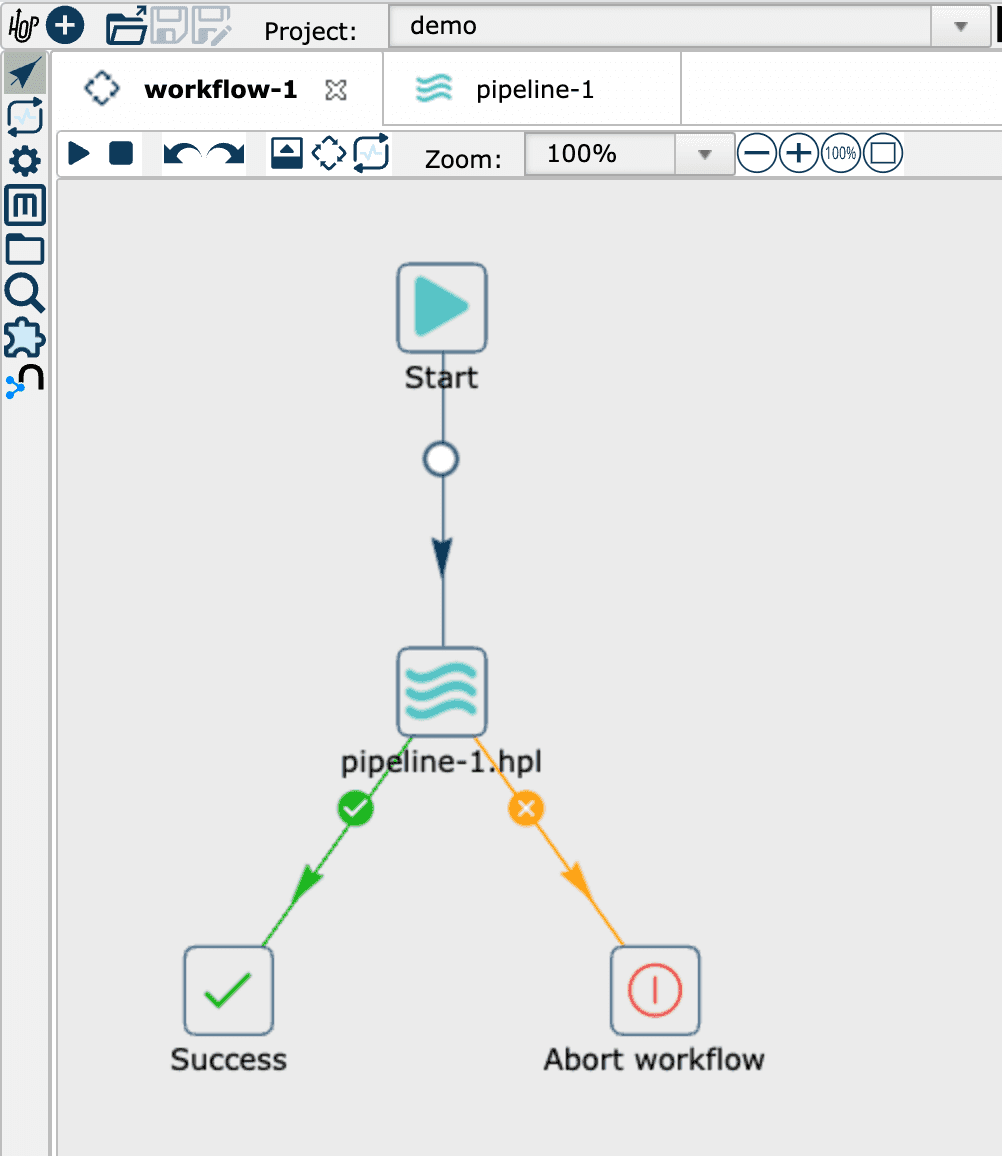
A hop between “Start” and “Pipeline” is created by clicking on the pipeline. Opening the action’s settings (via “Edit the action”) allows for selecting the pipeline-1.hpl file to associate with it.
This is followed by 2 additional actions: “Success” and “Abort workflow”, each connected to the pipeline via a hop to indicate the execution status. A custom message is added to the “Abort workflow” action, which will be displayed if the pipeline fails.
Publishing and operating workflows
Local launch
An initial pipeline and workflow have been created, and execution can now proceed.
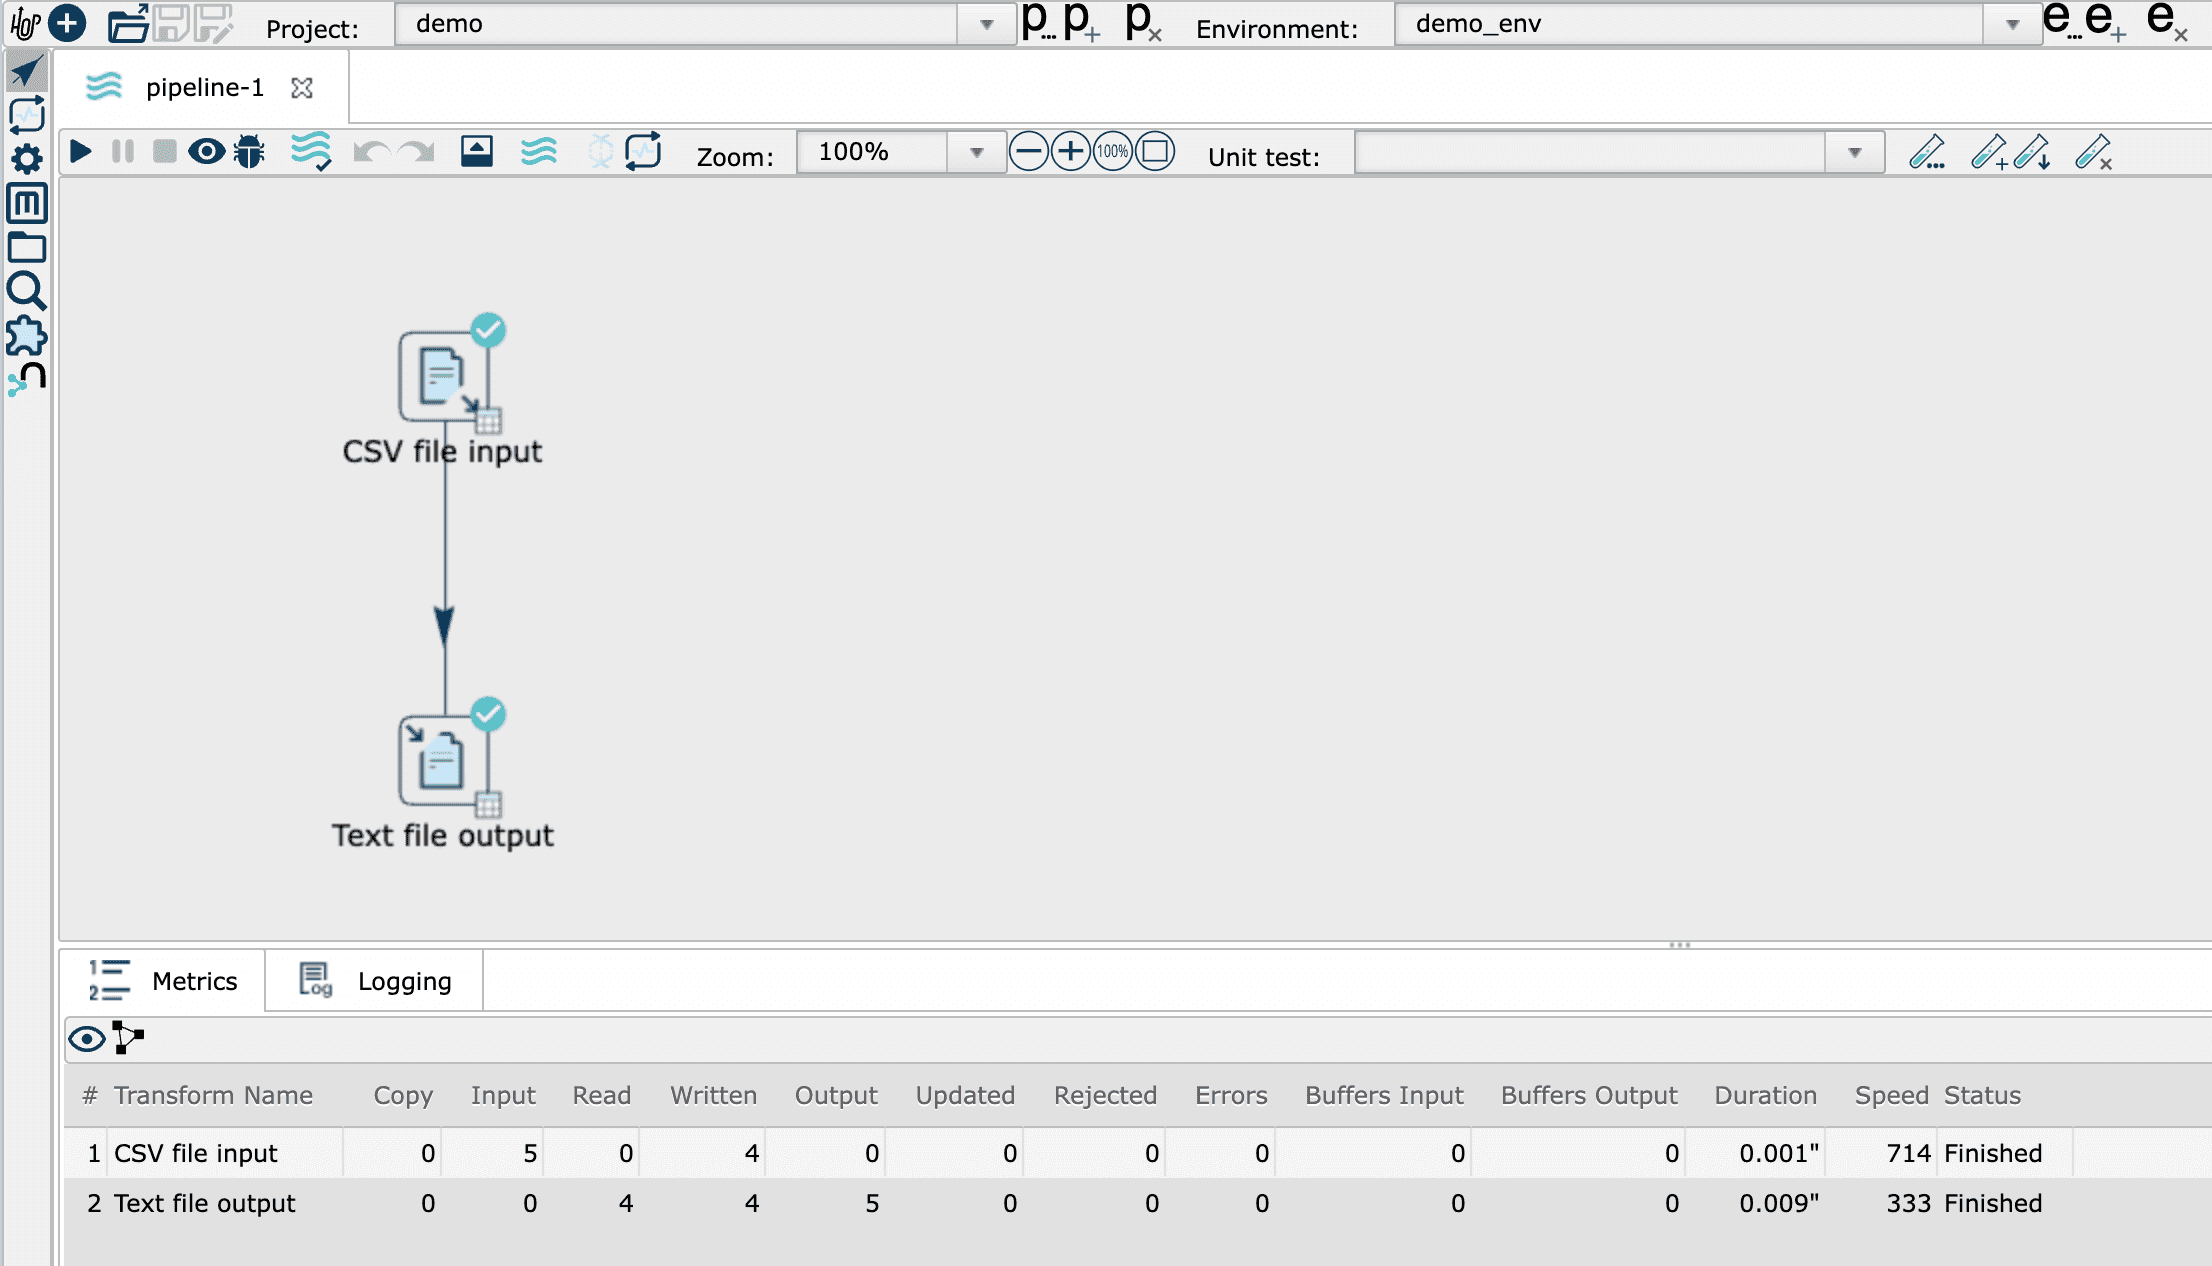
The “play” button located beneath the “pipeline-1” title opens the “Run Options” panel, which contains various execution settings based on the use case.
- Pipeline run configuration:
local - Log level:
Debug
The “Launch” button triggers the execution process. Relevant details are shown in the bottom panel, along with the output.csv in the project folder.
Remote launch
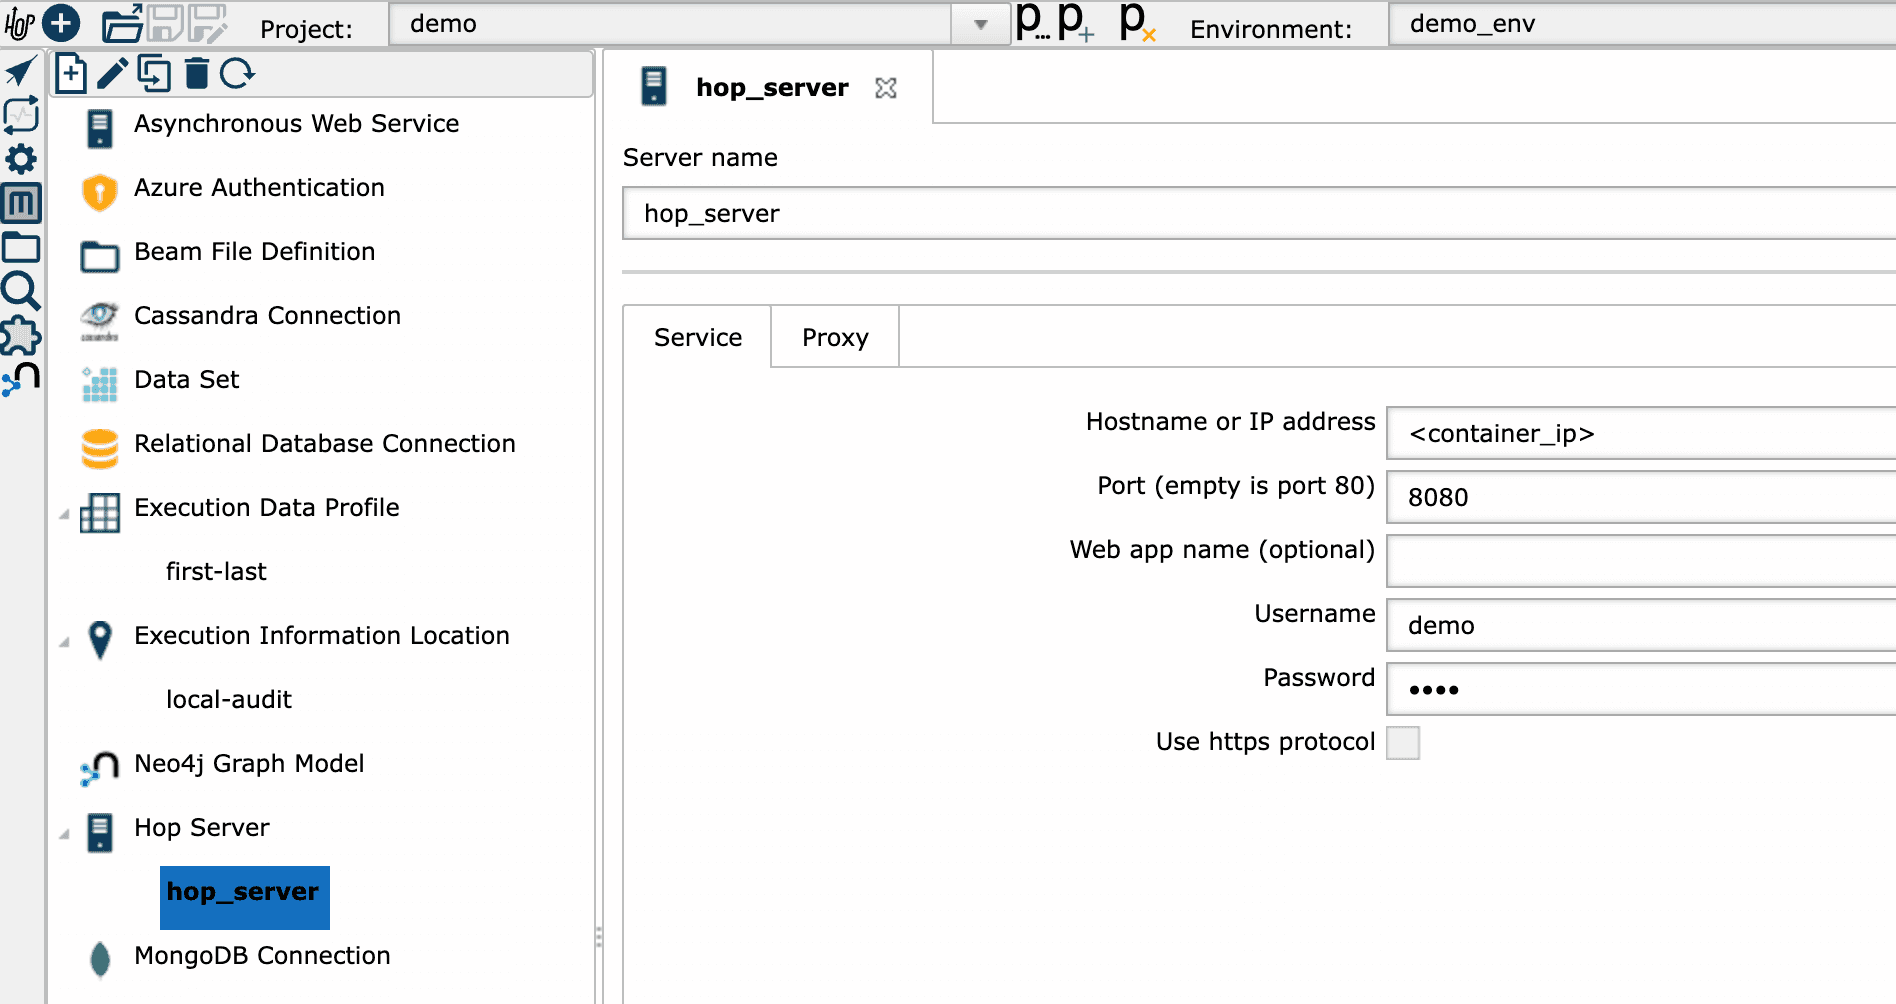
A workflow is executed on a remote Hop server. The remote connection is configured in the “Metadata” panel in the left toolbar, under the metadata type “Hop Server”. A new server configuration is created by double-clicking the “Hop Server” item, with its configuration file stored at ”${PROJECT_HOME}/metadata/server”
- Hostname:
- Port:
8080 - Username:
demo - Password:
The ip address of the container is obtained with by running:
docker inspect hop-server | grep "IPAddress"
A “Pipeline Run Configuration” is a type of metadata used to define how and with which execution engine the pupeline will be running. Here a remote configuration is defined to interact with a Hop server. Its configuration file is stored in the ”${PROJECT_HOME}/metadata/pipeline-run-configuration” folder. Notice that a “local” configuration is already present in this entity. Double-clicking the “Pipeline Run Configuration” item opens the configuration panel for setting up remote execution.
- Name:
remote - Description:
Remote pipeline submission - Execution information location:
local-audit - Engine type:
Hop remote pipeline engine - Hop server:
hop_server - Run Configuration:
local - Export linked resources to server:
checked
Similarly “Workflow Run Configuration” is used to define parameters for interaction with a Hop server. Its configuration file is stored in the ”${PROJECT_HOME}/metadata/workflow-run-configuration” folder.
- Name:
remote - Description:
Remote workflow submission - Execution information location:
local-audit - Workflow engine type:
Hop remote pipeline engine - Hop server:
hop_server - Run Configuration:
local - Export linked resources to server: checked
With workflow-1 open on the main canvas, clicking the “play” button on the upper toolbar opens the execution settings, where the “remote” run configuration is selected before running the workflow. This setup enables the workflow to run on a remote Hop server while providing detailed logs for monitoring.
- Workflow run configuration:
remote - Log level:
Debug
In the “Variables” tab, a variable for the project directory path is defined.
- DATA_PATH_1:
${PROJECT_HOME}
The “Launch” button starts the execution. The execution details will appear at the bottom panel and on the hop-server web interface.
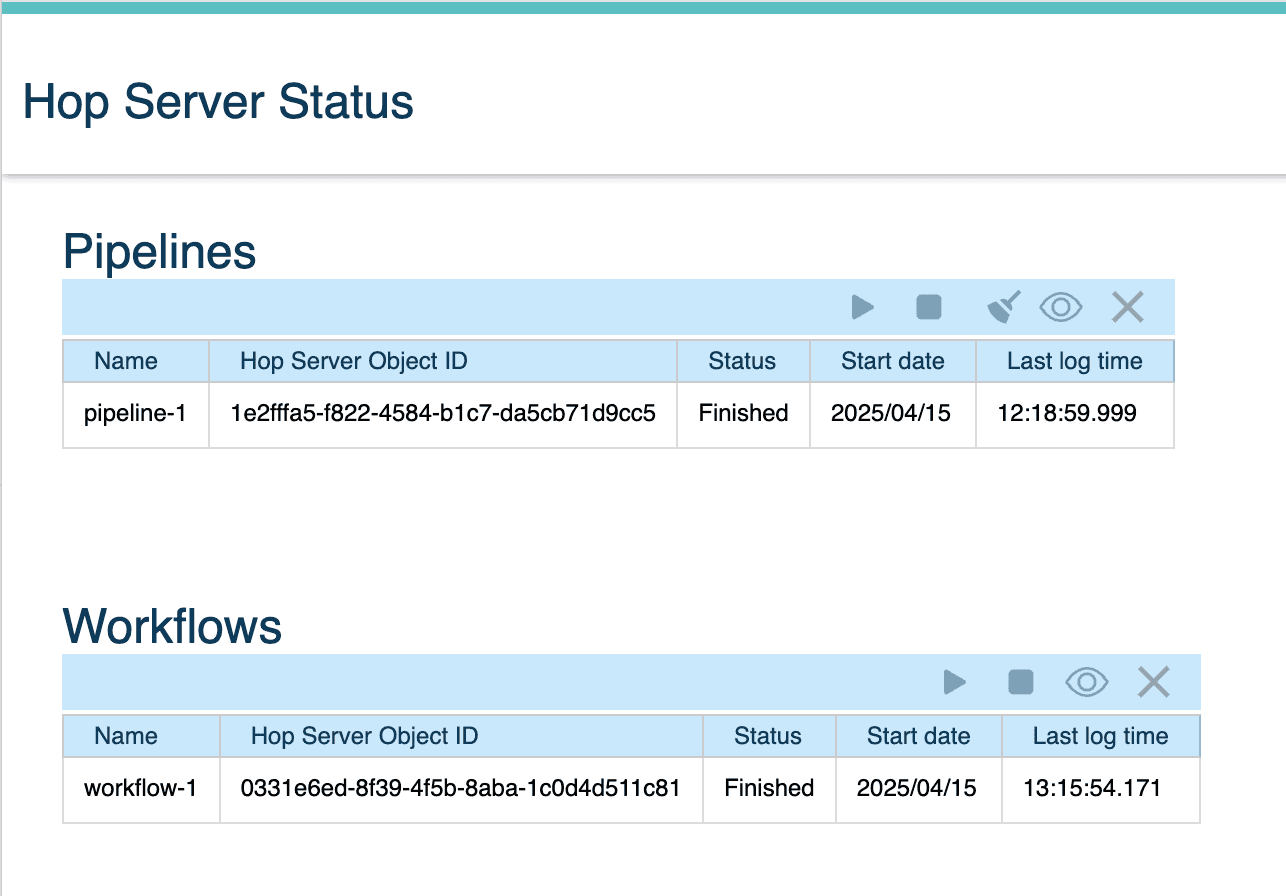
An alternative approach for executing the workflow remotely is to run the run.sh script within a bash session.
docker exec -it hop-web /bin/bash
/usr/local/tomcat/webapps/ROOT/hop-run.sh \
  --project demo \
  --environment demo_env \
  --level DEBUG \
  --runconfig remote \
  --parameters DATA_PATH_1=/home/hop/projects/demo \
  --file /home/hop/projects/demo/workflow-1.hwf
The execution log will be displayed both in the CLI and on the hop-server web interface.
Conclusion
Apache Hop provides a modern solution for data orchestration and engineering with an intuitive, user-friendly interface. It empowers users to perform ETL tasks and orchestrate pipelines visually, while supporting extensibility through plugins. Moreover, seamless Git integration ensures straightforward implementation of GitOps, making it easier to manage version control and track changes directly within the interface. As a result, Hop simplifies data flow management and enhances operational control.
After an introduction on Hop’s core concepts and internal architecture in the previous article, this tutorial demonstrates the procedure of building a basic pipeline and workflow, and how to publish them both locally and remotely. For further information, please refer to the official website.
